Showing posts with label thanksgiving. Show all posts

Tuesday, September 18, 2012

FALL QUOTE BLOCKS


At first this project was done from scrap wood hubby had from building our home. Well it became such a popular items I had to begin purchasing the wood to fill orders. These are done with 2 x 4's. The quotes are ones I designed in my SCAL program and cut with my cutter. 

For each post I am going to try and now list the material used so that you can also create my items. 

MATERIALS USED
2x4 wood - cut at the following lengths. 8, 7, 6, and 5
Acrylic paint - Poppy Orange, Brown, Ivory, and light brown
Vinyl - Off White, Orange, Brown
Ribbon - Olive green, Orange, Brown, Green Polka Dot
I purchased some fall floral stems and decorated the tops with little pieces from the floral stems


What a perfect gift to give to Family and Friends for the Holiday season. Fall is by far my favorite season of all.

Saturday, November 19, 2011

THANKSGIVING FAMILY TREE - WHAT I AM GRATEFUL FOR


This year I wanted Thanksgiving to truly signify what a family is about. A family stays strong by their roots and continue to branch out and grow, but are always connected. This bare tree also signifies that a family doesn't need to have the the leaves all the time to still be healthy and strong. Each season that we go through in life changes us and makes us grow. Even when the leaves fall they come back even healthier and stronger the next season because the foundation of the tree is strong enough to nourish the branches back to life every year.

I found some great branches from a birch tree and cut just the right sizes I needed. I then tied them all together and placed them in a crystal vase. I took some of my brown cardstock scraps and shredded them in the shredder and used it as filling in the vase.


I made hanging tags that open up and each of the tags has a special message to each of my family members who will be here for Thanksgiving day.

Thanksgiving is a very important day, it's a day to really remember each other and be grateful for each other and what we each represent to one another.


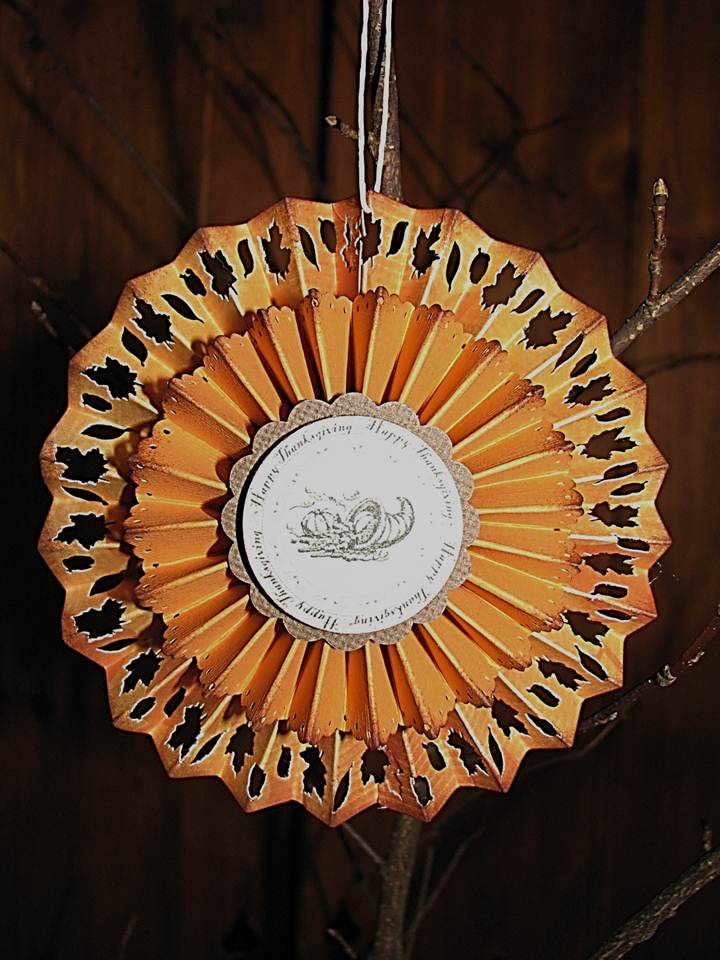
The Rosette was made from (2) 2 x 12 strips of carstock. I scored each strip 1/2 all the way to the end. I then used my fall punch to punch the edge with tiny leaves. The leaves I punch out I have set aside to scatter on my table. The second layer rosette is (2) 1 1/2 x 12 scored 1/2".


The second rosette was created from 1 1/2 x 12 strips and the second layer 1" strip. Follow same instructions as above.


Saturday, September 24, 2011

Pumpkin Poop Treats


It's hard to believe that it is already fall here in Northern Maine.

I thought I would bring a goody but oldy back out and offer the instructions for this cute little treat favors. They are great for any fall party or even for Thanksgiving.

You can get the instructions by clicking on the link below.

The poem is included in this post at the bottom that I place on the back of the box.


Pumpkin Poop
I started to carve a pumpkin
With my carving knife and scoop,
But the pumpkin got so scared
That he took a little poop!
It looked so cute and funny
Just like a candy treat.
So I am sharing it with you now
Because you are so sweet

Monday, November 22, 2010

THANKSGIVING GOODY BOXES


Every year I create some type of goody boxes filled with treats for my co-works. This year they will be getting Ferrero Rocher & Ferrero Rondnoir Chocolates & Homemade Fudge.

ROCHER FERRERO FAVOR BOX
I created the Ferreo box to put (3) chocolates in (2) of the Rocher & (1) Rondnoir. I created the cut SCAL file in SCAL 2. I then cut out the leaves using my big kick and some leaves dies that I had. The acetate on the top is cut to the same width as the top cover. I placed the button in the middle of the leaves with a sticky dot and then punched the whole with a piercing tool so that I could bring the ribbon through a tie a bow.

Scoring
across the 6 1/4 you will start at the end that doesnt have the cut out leaves as that is the top of the box
Score @ 1 3/8, 2 1/2, 4 1/8, 5 1/2
Turn the 6 7/8 length and score each end 1 3/8
TOP VIEW

FUDGE BOX

The box below was created to put 3 small bags of fudge in for my co-workers. It will be filled with Orange cream, Pumpkin Fudge & Peanut Butter Fudge. I used the leave cut out from the box for the Tag. The clear acetate is a piece measured 3 x 4 1/2 and adhered to the inside of the box. Tie it off with ribbon and the tag and it is good to go.

IF YOU HAVE ANY QUESTION ON ASSEMBLING THE BOXES JUST DROP ME A COMMENT OR EMAIL.

YOU CAN DOWNLOAD THE SCAL 2 FILE BELOW


Saturday, November 13, 2010

RECIPE GIFT GIVING


I wanted to come up with an idea to give out to my friends during the Holiday season that was to do with sharing some great pie & Casserole recipes, so I made a casserole & pie carrier that will hold a pie pate or casserole dish. I then took it a step further and created a matching Paper Bag full of the dry ingredients to be used in the recipe. The carrier fits a 9” pie plate or the 1 ½ -2 quart casserole dish.


The original pattern was in Quick Quilts#177 magaizne "ALL WRAPPED UP" (there are many tutorials out there) It calls for a 26" x 26" square but it was to big for what I wanted so that is why I came up with the 17x17 as it fit better for the sizes I was doing. The original tutorial did not call for stabilizer so I added it for stability. The matching bag is made out of a brown paper bag. I cut card stock out to fit the back and front although the back is larger to form the top flap.
The recipe is placed on the back so that it can be kept once you use all the ingredients


THE FREE INSTRUCTIONS

Cut (1) for outside print17 x 17
Cut (1) for Outside print 17 x 17
Cut 1 from Firm Stabilizer 17 x 17
Place right sides together and then place the stabilizer to one of the sides
Sew all together on 3 full sides, on the 4th side leave a 3.5" opening for turning
Turn right sides out, press all 4 sides and then sew 1/4 inch round all 4 sides
To create the handles you will cut (2) 5 1/2 x 5 1/2 blocks you will then press two sides 1/4" in
Now fold the other two open end wrongs sides together and press
Open and press again each end into the middle pressed part
(The steps for the handles are done like you would create bias just a thicker bias)
This will create the short carrier loops for the handle to come through

Sew the two short pieces to a corner opposite of each other. I pinned it 1/2 in from the edge


Now to create the handle you will cut one 5 1/2 x 17 and do the same thing you just did with the short loops like you are creating bias.
Sew the long handle to the two other opposite sides. I pinned it 1/2 down from the top point of the corner.


I HOPE THE ADDITIONAL PICTURE HELP :-)

Saturday, October 23, 2010

THANKSGIVING APRON RECIPE KEEPER

This weekends project was creating this beautiful Apron Recipe Book. The idea is that I will be gathering with about 10-15 other ladies and we will each be making this apron.

We will also need to bring 1 recipe 10-15 copies to exchange recipes with the other lovely ladies.
 BUT THE CATCH IS they must be THANKSGIVING DINNER RECIPES.

The Apron is free standing as it is designed as an easle. With it being binded to the top with my zutter binder makes it easy to flip through and to be able to be free standing.

I created the apron and Labels that each apron has with my Cricut Cutter.

How fun right!

I have created pockets with pull out tags that have many conversion charts & abbreviations,

I wanted to come up with a way to be able to hold a single recipe card to the front of the pockets front bottom edge. In order to achieve this I decided to place a piece of Card stock 4 7/8 x 1 1/2. I then punched it with my fall paper punch. When I adhered it to the bottom part of the front I did not adhered the top 1/4 portion of the sides so that my card would sit in there as a holder.

The bottom image shows how to place the recipe card to the bottom front of the pocket. This works perfect when you need that favorite recipe handy for all the directions. There are 6 categories that are in this apron book. Below are the pages on the back of each of the categories page.

Below are some more conversions Charts with pockets and pull out tags for some journaling

I designed my recipe cards in Microsoft Word. I printed them out and cut them to be 3 x 5. I then stamped each one and sponged the edges


Back of the Apron

THANK YOU FOR LOOKING

CHALLENGES I ENTERED
For Fun - Brown, Red, CReam

I WAS THE WINNER OF THE CHALLENGE!!!!

Sunday, October 17, 2010

THANKSGIVING BLESSING POEM AND STAND

Another creation I made from my new SCAL 2 cut file scroll stand. This will also be placed on my Thanksgiving table ensemble. I just love the Cricut cutter and the endless use for many of my projects. Fall is my favorite time of the year and I just love working with all the warm colors.

You can get the free SCAL 2 cut file for the stand by clicking HERE