Showing posts with label Card Box Sets. Show all posts

Tuesday, September 22, 2015

BUTTERFLY CARD SET


I am a fan of both Stampin Up and Close to My Hearts products. When I saw the new butterfly stamp set and coordinating punch from Stampin Up I new what I wanted to make. 


The Stamp set is called "Papillon Potporri". The matching punches are "Bitty Butterfly" and "Elegant Butterfly" and can all be purchased from Stampin Up. To give the butterfly's a 3-d effect, I first stamped the butterfly's directly onto my card, I then stamped a bunch from the same color card stock and used the punches to get my 3-d butterfly's. I adhered them to the coordinating colors on the cards and bent the wings up. 
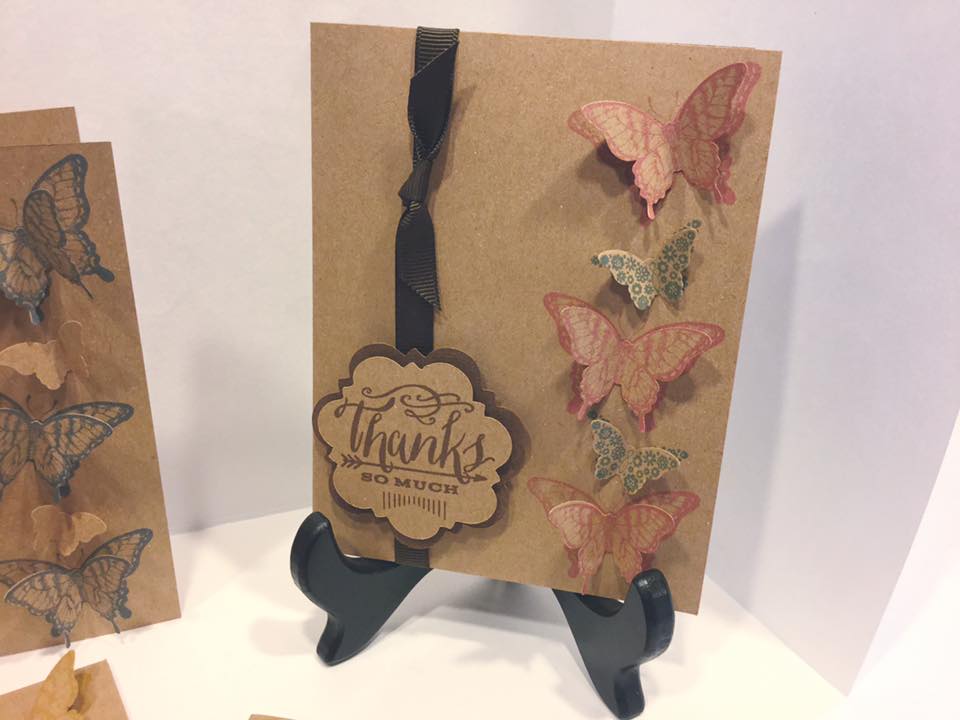

The label is from Close to My Heart and is called "You Mean the World to Me Occassions". I used the Artistie Cricut Cartridge that you can also purchase through Close to My Heart to make the label and matting. I then stamped it with the sentiments. 
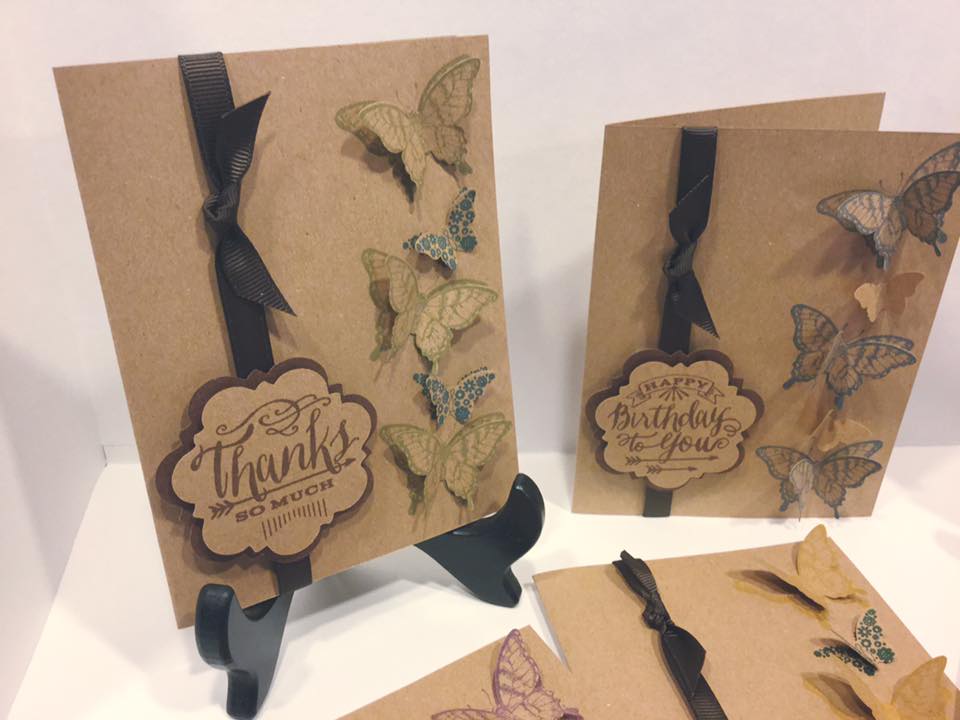


I finished the card off with ribbon. Each one is left blank on the inside so that you can write your own sentiments and/or message inside. 

Wednesday, May 6, 2015

PAYSLIES AND CHALK BOARD CARD SET


I used CTMH retired paper packet "Laughing Lola" along with CTMH Cricut cartridge "Art Philosophy" and coordinating CTMH stamp sets "frame flair, flair" and "card chatter- sympathy occasions inked with white daisy. 

I used Whisper white ink to do the interchangeable labels to give it the chalkboard effect. 

The card box was created by Angie Juda "My Chic N Scratch" 
You can watch the video at the link below

CARD DESIGN 1 - first card on the left
Thistle solid color first layer- 4 1/8 x 5 3/8
Bottom checkerboard Print  - 4 x 4
Top Paisley Printed - 4 x 1 1/2
Flaxin solid color - 4 x 1 1/8 - punched with a flower punch one one edge

CARD DESIGN 2 - second card to the left
Bottom print paper layer - 4 1/8 x 5 3/8
Solid thistle color middle layer - 1 1/2 x 5 3/8
Printed paper top middle layer-  1 x 5 3/8

CARD DESIGN 3 - card in middle 
Flaxin solid color bottom layer - 4 x 5 1/4
Printed paisley layer - 4 7/8 x 3 3/4
Thistle solid color - 3 7/8 x 2 3/4
Flaxen solid color layers - 3 3/4 x 2 5/8
Printed paper - 3 5/8 x 2 1/2 - use paper punch on one long edge
Top printed paper layer - 3 5/8 x 1/2

CARD DESIGN 4 -  2nd card to the right
Printed paper layer - 4 1/8 x 5 3/8
Flaxin solid color middle layer - 5 3/8 x 2
Printed paper middle layer - 5 1/4 x 1 7/8
Printed paper top layer - 5 1/4 x 1 - use paper punch on one long edge

CARD DESIGN 5 - Card in the first row to the left
Flaxin solid color - 4 1/8 x 5 3/8
Thistle solid color layer - 3 @ 1 3/4 x 4
Printed paper layer - 3 @ 1 5/8 x 3 7/8

Monday, March 30, 2015

ANY OCCASSIONS CARDS STAMP-A-STACK


HERE IS ANOTHER SET MADE WITH SOME STOCK PAPER I HAD


CARD DESIGN 1 - Card in the back on the right
First Layer - 4 1/8 x 5 3/8
Printed Top  - 4 x 1 3/8
Printed Bottom 4 x 3/4

CARD DESIGN 2 - Card in the second row to the right
Bottom Layer - 4 1/8 x 5 3/8
Printed Layer - 4 x 5 1/4
Middle Layer - 5 1/4 x 2
Printed Middle Layer - 5 1/8 x 1 7/8

CARD DESIGN 3 - Card in the first row to the right
Bottom Layer - 5 3/8 x 4 1/8
Printed Layers - 2 @ 4 x 2 1/2

CARD DESIGN 4 - Card in the second row to the left
Bottom Layer - 4 1/8 x 5 3/8
Printed Layer - 4 x 5 1/4
Middle Layer - 3 1/4 x 4 3/8
Top Layer - 3 1/8 x 4 1/4

CARD DESIGN 5 - Card in the first row to the left
Bottom Layer - 3 @ 1 3/4 x 4
Printed Layer - 3 @ 1 5/8 x 3 7/8


The box used in the first card set is  one I found on youtube by "ChicnScratch" The box is a very simple box to create and she explains it perfectly. 


This is another way I packaged this card set. In place of the brown matting, I used a teal card stock to make the labels pop. 


This class is being held October 11th in my home. I wanted to do my first one with a pretty simple design. I selected just your basic occasions and not a holiday one yet. I will be doing another one in a couple weeks for Christmas cards.
There are five designs two of each design for a total of 10 cards.
I designed the cards so that you can rotate the card either portrait or landscape and select any label you want.
I used the CTMH stamp sets listed below to make the labels. What's so great about these stamp sets is that they coordinate with the Cricut Cartridges "Artiste" and "Art Philosophy"
CARD HOLDER INSTRUCTIONS
The card holder is made using the Cricut Cartridge "Artiste"
Page 47 cut both pieces at 5 3/4. This will comfortable hold the cards and labels.
MATERIAL USED
  • Kraft & Brown Cardstock for the base of all the cards and card holder
  • The designer paper was a gift from a friend so I am not sure who it is by
  • Stamps from CTMH - Casual Expressions Occasions, Holiday Tags Occasions, and Cricut Art Philosophy Tags (this one came with the Cricut cartridge that is specialized just for CTMH).
  • CTMH specialized Cricut cartridges (can only be purchased through CTMH). "Artiste" and "Art Philosophy"

Sunday, March 22, 2015

SPRING DAYS CARD SET


SPRING CARD SET


With spring around the corner, its time for me to make my little gift card sets. I like to make these up to give to family and friends when they host family gatherings. Or just give them as a special gift of appreciation for someones kindness. 

I used the two paper stacks above to make all the cards below. I used one stamp set and my Cicut cutter. I wanted to show that you do not need a lot of scrapbook materials to create beautiful designs and creations. 


I also designed the box to fit all the cards and envelopes. I needed a box bigger than most tutorials on Pinterest due to the dimension of some of the cards. 

The measurements for the card box are as follows:

Bottom of box -  cut 1 @ 9 7/8 x 8 5/8 
score all sides at 2"
Snip corners up to score line and assemble box bottom

Top of box - cut 1@7 15/16 a 6 3/4
score all 4 sides at 1"
Snip corners up to score line and assemble box top

Matting
For the box top cut solid color at 4 5/8 x 5 7/8
Printed paper 4 1/2 x 5 3/4

Side Matting
Solid color cut 2 @ 7/8 x 4 5/8 and 2 @ 7/8 x 2 5 7/8
Printed Paper 2 @ 3/4 x 4 1/2 and 2 @ 3/4 x 5 3/4

CARDS

I matted the inside of each card to continue the elegant look and added a simple verse from the following CTMH Stamp sets. 


Sunday, October 5, 2014

ALL OCCASSION CARD SET


Add caption

This delightful set was created for a friend. I wanted to create a set that she could turn the card in landscape or portrait to get a different style and then add any label she wanted for the upcoming occasion she would need the card for.

I used the DCWV paper stack "The Blue Citrus Stack"

 I designed seven styles, two of each, for a total fourteen cards per set.
To make the labels I used the CTMH Stamp set "Casual Expressions Occasions" and my Cricut and the CTMH "Artiste" Cricut cartridge for the labels and matting. This stamp set is specially designed to coordinate with the Cricut Cartridge "Artiste"
I made a box for all the cards and labels to fit into.
BOX INSTRUCTIONS
You must have some knowledge of box construction as I have no photos
Top
The top is cut at 6 1/2 x 4 1/2 and scored at 1 inch on all 4 sides.
Bottom
Cut two at 11 1/8 x 8 and score on both short sides at 4 1/4 and one long side at 2 1/8 for form the bottom of the box. Fold on score lines. Be sure to trim the bottom of the box. These two pieces fit into each other to form the box. Adhere sides to each other.


Sunday, June 22, 2014

ELEGANT BLANK CARD BUNDLE


This delightful card set was made as a special order. They are blank cards so that the individual can write their own little message in there, or use a special verse stamp on the inside. I made a box with a clear center to keep all the cards in.

I like making these kits up and having them on hand, this way when I need a card for a special occasion, to send some encouragement or just a special thank you, I have them on hand.

This set was made as a gatefold card and the inside was stamped with coordinating stamps that matched the outside of the card. Each one was then tied with twine.

There are plenty of tutorials on "PINTEREST" on how to make a GATEFOLD CARD.