Showing posts with label DIY tools for a crafter. Show all posts

Monday, November 7, 2011

RIBBON STORAGE HOLDER


Once again "JACKPOT" at "MARDENS" I found many styles of ribbon for .25 to .50 cents a spool so I of course bought SEVERAL this only shows a small portion of what I have. I then had to think of a way to incorporate some type of ribbon storage for my shelves in my sewing area in my craft room.

I came upon some spring curtain rods at Family dollar for $3.00 and thought hhhhmmmm  would that work!!!!!


By GOLLY GEE it did. I did however have to put a staple right under each end to stop it from slipping down due to the rubber ends and smooth service.

This keeps all my ribbon organized by color. I have 3-4 more to add to the shelving unit and will also have some little bins to store some misc ribbon items on the shelf.


I have some ribbon in jars on top of the spooled ribbon shelve. Most are pieces that I have cut for projects or ends of the spool salvages.


Tuesday, March 22, 2011

PORTABLE IRON BOARD


I found an old shelf that was just the perfect size that would fit at the end of my table to be used as an iron board.

You will need a piece of wood the size you would like, a towel and your favorite print of fabric.


I cut 1/2" all around the piece of wood for me to be able to staple the towel to the board. Staple the towel on all 4 sides of the piece of wood.


Measure and cut the printed fabric to fit over your board like you would cut a pillow case out.


Sew the sides and hem the top. Place over board. Now you have a portable iron board.

Monday, March 7, 2011

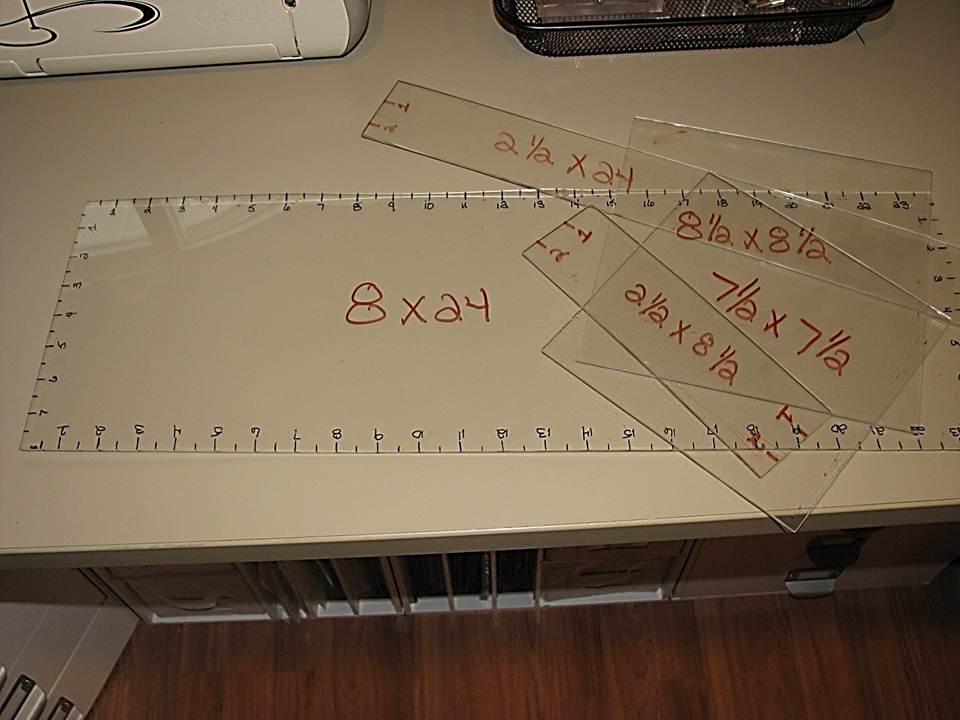
PLEXI GLASS RULERS


Can I tell you how AMAZING my hubby is.

 He is always looking around his garage when he is cleaning it up and thinks before he throws anything away if I can use it. So Hubby came to me and asked me if there was anything I can use when I am quilting with his extra plexi glass.

WELL guess what hubby came up with ;-)

With his saw and the left over plexi glass he cut me up some quilting rulers. I had him do up specific sizes that I used a lot of. This is such a great and cheap way for a new quilter to be able to have rulers to start quilting with at a great cost. I love my actual quilting rulers but also now use the handmade ones just as much.

I used a thin permanent marker to do the rules lines

Wednesday, January 12, 2011

PORTABLE QUILT WALL


 I have seen many ideas for a quilt wall and just had to have one. However I do not have an empty wall to be able to do this. So I went to dear hubby and told him what I was looking for. So after researching the internet we came upon a site that showed how they used Blue Board Styrofoam and felt material and attached it to the wall. Hubby just happens to have a piece of Blue Board Styrofoam insulation hanging around and I had a large plastic table cloth. We stapled the table cloth to the blue board felt side up and TADA!!!!! My Portable Quilt Wall is finished. It measurement is 82 x 48. If I want to do a bed quilt I just connect two of the blue boards together.


Saturday, November 20, 2010

IRON BOARD RECOVER


Pin a 7/16" Grosgrain ribbon around the edge of the cut material


I added a 7/16" Grosgrain ribbon to the edge to create the insert for the black coording


Tuesday, October 19, 2010

CREATING YOUR OWN SEW IN LABELS


I wanted my sew in labels to match my blog header and my business cards. So after some playing around I came up with these. I designed them first in Word, printed them on iron on transfer for fabric and ironed them onto Twill tape that is 1 1/2". I iron it on to the bottom edge so that leaves the top for the seam allowance to be sewn in the corner of all my purses/handbags. I complete each edge of the lable with a double overedge stitch so the twill tape does not fray

I finish off each item I create with a hanging tag below. The hanging tags were also created in word with the business card template. Once printed I punched the top and bottom edges with my eyelet paper punch. Now labels and tags (I list the price of my items on the back of the tag when I do craft fairs) match for all my sewing projects.


STYLE 2
I ran out of my 1 1/2 twill tape today and labels I already made so I had some canvas 1" ribbon and cut them long enough to fold in half. I then ironed on my label once again and my label was complete. I like them both so I will make a bunch of both styles to have on hand at all times.