I am a big fan of "PRIMITIVE DECOR" and I have been looking everywhere for just the right Christmas ornaments for my tree this year. I want to have as many handmade items added to my tree this year and as tattered and primitive as it can be. I searched all over. "I SEAM TO SEARCH ALOT" and I should know by now I always end up making it myself, so I have to so stop searching and begin designing right of :-).
I looked at one of my small tin stars I had and just knew there had to be a way to fold the card stock to create the star.
By Golly I did find a star online with the score lines drawn on it for folding, so I went right to work on how I interpreted it visually for others.
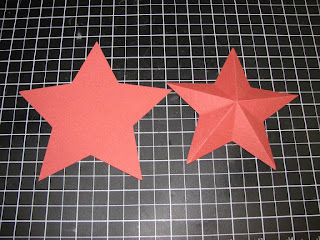
Begin with a star cut out by hand or if your lucky enough like me to have a cricut cutter cut out a star the size you want it to be. You can also make them several diffirent sizes.
"BE SURE IT IS A 5 POINTED STAR"
I cut mine out to be a 6" star
You will then score from one star point to a star hill as I call it.
Below is a star with the scoring marks done in pencil for you to see where to score
Once you have scored all you lines you will then fold up all the points.
I call this creating the hills.
You will then create the Vallie's
Now that you have all your score lines folded you will then fold them all together to give shape to the star.
Once all folded together squeeze it at the top
Open the star and push down in the center. Your star is now complete.
I sponged the edge of the star with Burgundy ink to give it a rustic feel and adhered it to a folded Rosette ornament with two dimensionals.


Love this...will be trying it this afternoon :-)
ReplyDeleteyou can also make tin stars the exact same way using pie plates
ReplyDeleteThis is lovely! how did you attach the star to the rosette as it doesn't sit flat?
ReplyDelete